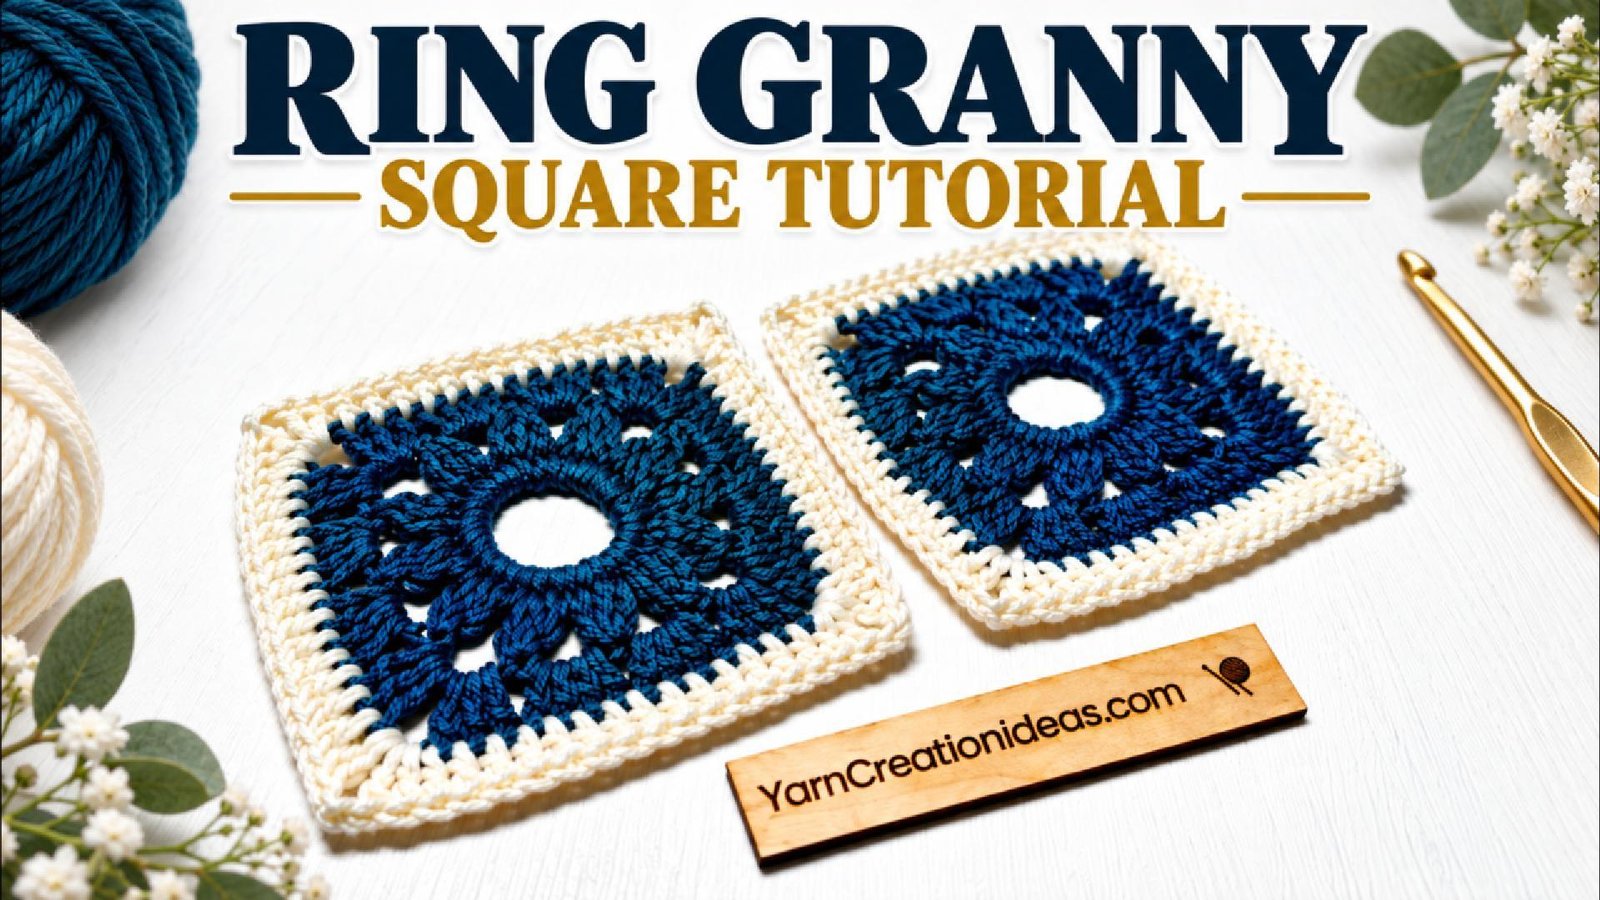
Are you a granny square lover? If you’re looking for something a little different from the traditional granny square, you’ll love this beautiful Ring Granny Square Crochet Pattern!
Featuring an open circular center, lovely texture, and a classic square shape, this design is perfect for adding a unique touch to your crochet projects.
I’m using peacock teal and cream yarn to create these squares for my next crochet bag. The open center will allow a beautiful floral fabric lining to peek through, creating a lovely combination of crochet and fabric.
In this free step-by-step tutorial, I’ll show you how to crochet the Ring Granny Square, from creating the center ring to shaping the corners and completing the final round.
Grab your yarn and crochet hook, and let’s get started! 🧶
💛 Why You’ll Love This Ring Granny Square
💛 A Beautiful Open Center The circular opening gives this granny square a distinctive look and lets a colorful fabric lining peek through.
🧶 Lovely Texture The combination of crochet stitches creates an interesting design that looks beautiful from every angle.
🎨 Endless Color Combinations Make it in one color or mix your favorites! I’m using peacock teal and cream for my next crochet bag.
👜 Perfect for Crochet Bags Each finished square measures approximately 5 × 5 inches, making it a wonderful building block for totes, purses, and other creative projects.
✨ A Fresh Take on a Classic If you love traditional granny squares but want to try something different, this pattern adds a beautiful new design to your collection.
🌸 Beautiful with Fabric Pair your crochet squares with a floral or contrasting fabric lining to create a gorgeous combination of texture and color.
✨ Inspiration Behind the Design
I love creating crochet bags that combine beautiful stitches with colorful fabrics. For my next bag, I wanted to design a granny square that would allow the fabric lining to become part of the overall look.
That’s how this Ring Granny Square came to life!
The open circular center creates a beautiful window for the fabric to peek through, while the textured stitches and classic square shape make it perfect for building a crochet bag.
I’m using peacock teal and cream yarn for my squares, paired with a beautiful floral fabric lining. I can’t wait to see how these colors come together in the finished bag!
💡 Tip: Try placing different fabrics behind your finished granny square to see how the colors and patterns change its appearance. You might discover a combination you absolutely love!
🧶 Ad — Thank you for supporting YarnCreationIdeas.com
🧶 Ad — Thank you for supporting YarnCreationIdeas.com
🧵 Stitch Abbreviations (US & UK)
| Abbreviation | US Term | UK Equivalent | Description |
|---|---|---|---|
| ch | Chain | Chain | Foundation or turning stitch |
| sl st | Slip Stitch | Slip Stitch | Join or move without height |
| sc | Single Crochet | Double Crochet | Short, tight stitch |
| dc | Double Crochet | Treble Crochet | Taller stitch with one yarn over |
| tr | Treble Crochet | Double Treble Crochet | Very tall stitch with two yarn overs |
| hdc | Half Double Crochet | Half Treble Crochet | Mid-height stitch with one yarn over |
| inc | Increase | Increase | Two stitches in one stitch |
| dec | Decrease | Decrease | Two stitches worked together |
| FO | Fasten Off | Fasten Off | Cut and secure yarn |
| st(s) | Stitch(es) | Stitch(es) | General stitch reference |
| BLO | Back Loop Only | Back Loop Only | Work into back loop for texture |
| STACKED SC | Stacked Single Crochet | Stacked Double Crochet (UK) | Used in place of a turning chain |
✂️ Tip: You can screenshot or print this Stitch Abbreviations Chart to keep next to your workspace. It’s especially handy if you’re switching between US and UK terms or learning new stitch names!
🧶 Skill Level
This pattern is suitable for crocheters who are comfortable with basic stitches and ready to explore a new granny square design. You’ll practice creating an open center, working crochet clusters, and shaping a square with defined corners.
✨ Techniques Used
🧶 Ring Granny Square Crochet Pattern Instructions
Pattern Type: Worked in joined rounds
Terminology: US crochet terms
Finished Size: Approximately 5 × 5 inches
🟡 Round 1 – Create the Open Center
Using your teal yarn and a 4.0 mm crochet hook, make a slip knot and chain 12.
Join with a slip stitch into the first chain to form a large foundation ring.
Work 36 single crochet stitches into the center of the ring.
Join with a slip stitch to the first single crochet.
Stitch Count: 36 SC
🟡 Round 2 – Decorative Crochet Clusters
Continue working with your teal yarn.
First Cluster: Work a stacked single crochet into the first stitch. Work an unfinished double crochet into each of the next two stitches. Yarn over and pull through all three loops on your hook to complete the cluster.
Chain 3.
Remaining Clusters: Work an unfinished double crochet into each of the next three stitches. Yarn over and pull through all four loops on your hook to complete the cluster.
Chain 3.
Repeat the remaining-cluster instructions around the ring until you have 12 clusters. Do not skip any stitches.
After the final chain 3, join with a slip stitch to the top of the first cluster.
Stitch Count: 12 clusters and 12 chain-3 spaces
🧶 Ad — Thank you for supporting YarnCreationIdeas.com
🧶 Ad — Thank you for supporting YarnCreationIdeas.com
🟡 Round 3 – Shape the Granny Square
Continue working with your teal yarn. This round transforms the circular center into a beautiful square.
Starting Corner: Move into the next chain-3 space with a slip stitch. Work a stacked single crochet, followed by 1 double crochet into the same space.
Chain 2, then work 3 double crochet into the same chain-3 space.
First Side: Work 4 half double crochet stitches into each of the next two chain-3 spaces.
Next Corner: Work 3 double crochet, chain 2, and 3 double crochet into the next chain-3 space.
Continue Around: Repeat the following sequence two more times:
- Work 4 HDC into each of the next two chain-3 spaces.
- Work (3 DC, ch 2, 3 DC) into the next chain-3 space.
Complete the Final Side: Work 4 HDC into each of the remaining two chain-3 spaces.
Work 1 final double crochet into the starting corner space to complete the first corner.
Join with an invisible join and fasten off your teal yarn.
Stitch Count: 14 stitches per side, with four chain-2 corner spaces.
🟡 Round 4 – Complete the Cream Border
Join your cream yarn into any stitch along one side of your square.
Work a stacked single crochet into the first stitch. This counts as your first double crochet.
Work 1 double crochet into each remaining stitch across the side until you reach the next corner space.
Corner: Work 2 double crochet, chain 2, and 2 double crochet into the corner space.
Continue Around: Work 1 double crochet into each stitch along the next side.
Repeat the corner instructions at each corner:
(2 DC, ch 2, 2 DC)
Continue working around the square, making 1 DC in every stitch and completing all four corners.
Join with an invisible join and fasten off your cream yarn.
Fasten off and weave in your yarn ends using a yarn needle.
Stitch Count: 18 double crochet stitches per side, with four chain-2 corner spaces.
🧶 Ad — Thank you for supporting YarnCreationIdeas.com
🧶 Ad — Thank you for supporting YarnCreationIdeas.com
✂️ Finishing Your Ring Granny Square
Once you’ve completed Round 4, fasten off your yarn and weave in all loose ends using a yarn needle.
Gently shape your granny square, making sure all four corners are evenly positioned.
If needed, lightly block your square to approximately 5 × 5 inches. Blocking is especially helpful when making multiple squares for a larger project.
💛 Final Thoughts
I hope you enjoyed making this beautiful Ring Granny Square as much as I did!
I love how the open circular center and textured stitches give this design a unique look while still keeping the classic granny square shape.
I’m making 19 of these squares for my next crochet bag, using teal and cream yarn with a beautiful floral fabric lining. I can’t wait to show you how they all come together!
Stay tuned for the next tutorial, where we’ll continue turning these granny squares into a beautiful handmade bag.
Happy crocheting! 🧶💛
📌 Pattern Terms of Use & License
✅ You are welcome to use this Ring Granny Square crochet pattern to create your own finished projects for personal use, gifts, craft fairs, and small business handmade sales.
❌ Please do not copy, reproduce, rewrite, redistribute, or repost this pattern, blog post, video, or written instructions in any form.
💖 If you share your finished Ring Granny Squares or crochet projects on social media, I’d absolutely love to see them! Please credit YarnCreationIdeas.com and tag me so I can cheer you on and share your creativity.
🔗 Want to share this pattern with others?
Please share a
link to this blog post or YouTube video
rather than reposting the instructions elsewhere.
🧶 Thank you for respecting the time, creativity, and work that goes into creating free crochet tutorials and patterns for this community.
🌟 Love This Pattern?
Support free crochet tutorials like this one and help keep the yarn love going!
- 📌 Pin it to save this pattern for later and share it with other crochet lovers.
- 🔍 Explore more free patterns on YarnCreationIdeas.com.
- 🎥 Subscribe on YouTube for more granny squares, crochet stitches, and beautiful handmade bag projects!
💖 Your support helps me continue offering free crochet patterns. Thank you!
💬 Comments & Questions
Have a question about this Ring Granny Square crochet pattern? Need help with a round, stitch count, or finishing detail? I’m here to help!
💬 Leave a comment below! I read every message and love hearing from you. 💕
📸 Made your own Ring Granny Square? Share your finished project on social media using #YarnCreationIdeas so I can celebrate your creativity!
🧶 What colors would you choose for your Ring Granny Square? I’d love to hear your ideas in the comments!
✨ Kindness counts: beginners are always welcome and encouraged.
🌟 Let’s keep stitching and growing together! ✨