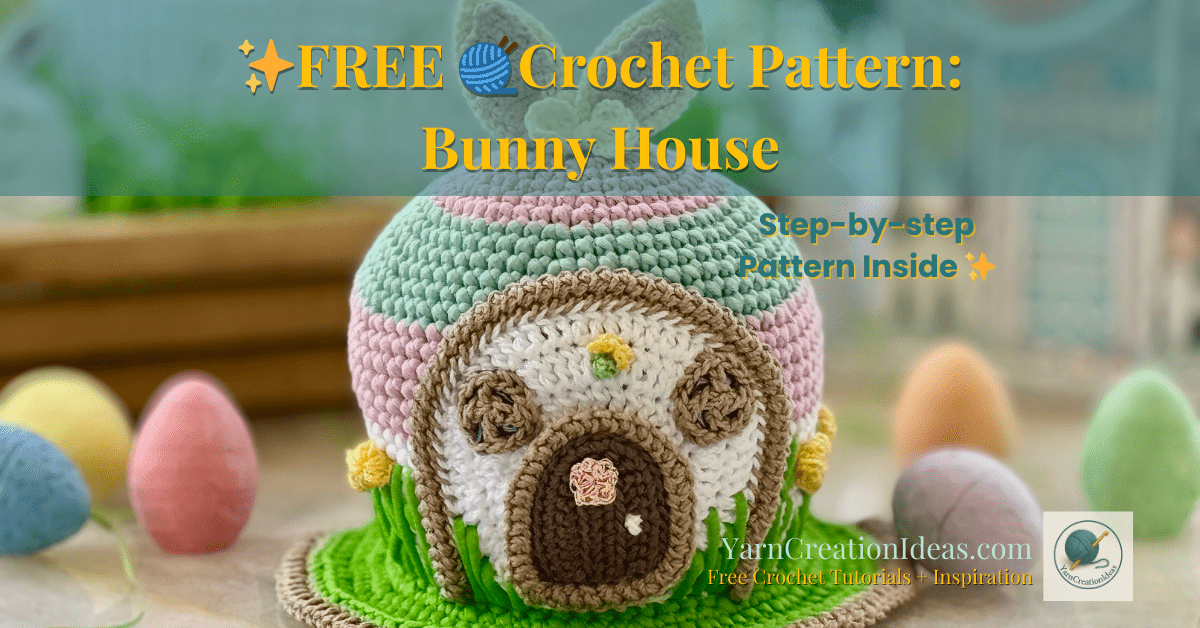
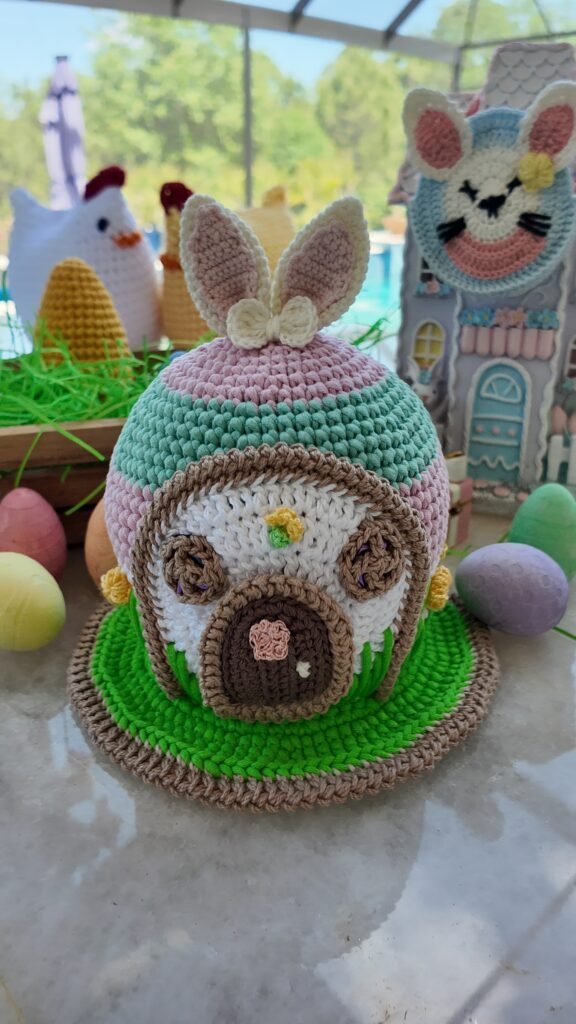
🧶✨ Bring springtime magic to life with this FREE Bunny House Crochet Pattern! This adorable and whimsical crochet bunny house is perfect for Easter decor, fairy garden displays, or as a delightful handmade gift. Designed with a combination of soft cotton and textured yarns, this cozy bunny home features charming details like a mini door, floral accents! Ideal for intermediate beginners and intermediate crocheters, this step-by-step crochet tutorial includes stitch abbreviations, yarn recommendations, and assembly tips. Whether you’re crafting for a child’s room or creating a one-of-a-kind spring centerpiece, this crochet bunny house pattern will inspire creativity and joy. Watch the full tutorial video, follow the detailed instructions, and download the pattern for FREE!
If you prefer video tutorials, I’ve got you covered! You can watch the full step-by-step video here:
You can follow along with the full video tutorial here:
👉 Watch Me Crochet This Magical Spring House From Start To Finish!
🧵 Materials Needed for This Adorable bunny House FREE Pattern

- Yarn #4 in various colors (house body, roof, door, etc.) – used with 3.75 mm hook
- Fundamental Cotton by Yarn Bee – used with 3.25 mm hook (details like door or windows)
- Baby Bunny yarn by Big Twist – used with 2.25 mm hook (soft details like bunny or fur trims)
- Fine yellow yarn and pink (for flowers) – used with 1.4 mm and 1.5 mm steel hook
- Markers, tapestry needle, scissors
- Strings for marking stitch placements
- Stuffing Material (Polyfill or your choice)
- Shinny small piece of material for the windows to make 2 tiny circles
✨ Skill Level to Make This Crochet Fairy House Free Pattern
Beginner to Intermediate – You should be comfortable with magic rings, basic shaping, and switching colors. No advanced techniques required.
🧵 Stitch Abbreviations (US Terms)
| Abbreviation | Stitch Name |
| ch | chain |
| sc | single crochet |
| dc | double crochet |
| hdc | half double crochet |
| sl st | slip stitch |
| inc | increase (2 sc in one stitch) |
| Inv dec | Invisible decrease (sc two stitches together) |
| MR | magic ring |
| BLO | back loop only |
| FLO | front loop only |
| tr | treble |
✍️ Step-by-Step Crochet FREE Pattern Bunny House
🌼 House (using #4 yarn and 3.75 mm hook)
Round 1:
Start with a magic ring, 8 SC inside de magic ring.
Round 2:
INC in each stitch around = 16 ST
Round 3:
(1 INC, 1 SC) x 8 (24)
Round 4:
(3 SC, 1 INC) x 6 (30)
Round 5:
(2 SC, 1 INC, 2 SC) x 6 (36)
Round 6:
(1 INC, 5 SC) x 6 (42)
Round 7:
(3 SC, 1 INC, 3 SC) x 6 (48)
Round 8: Change color
(7 SC, 1 INC) X 6 = 54 ST
Round 9:
54 SC
Round 10:
(8 SC, 1 INC) X 6 = 60 ST
Round 11:
60 SC
Round 12:
(9 SC, 1 INC) X 6 = 66 ST
Round 13:
66 SC
Round 14: Change color
(10 SC, 1 INC) x 6 = 72 ST
Round 15:
72 SC
Round 16 to Round 19:
72 SC
Round 20: Change colors
72 SC
Round 21:
10 SC, 1 INV DEC x 6 = 66 ST
Round 22:
66 SC
Round 23: to Round 24
66 SC
Round 25
(9 SC, 1 INV DEC) X 6 = 60 ST
Round 26, Round 17, Round 28
60 SC
FRONT OF THE HOUSE: Crochet Fairy House Free Pattern
USE Fundamental cotton by Yarn Bee with 3.25 mm hook
Colors that I used: White, dark beige and brown
Round 1:
- Slip knot
- Chain 4 and close the circle
- Chain 3 + 14 DC
Round 2:
(2 DC, for each stitch) X 15 = 30 ST
Round 3:
- (2 DC, 1 DC) x 15 = 45 ST
Round 4:
- (2 DC, 1 DC, 1 DC) X 15 = 60 ST
Frame border of the front house using Romanian Cord Caterpillar Stitch
USE Fundamental cotton by Yarn Bee with 3.25 mm hook
Colors that I used: Dark Beige
🪴 Foundation:
Slip knot, CH 2
🌀 Row 1 (Starting the Cord):
In the 2nd chain from the hook, work 1 single crochet (sc).
Now, you turn the work
Insert the hook into the loop to the left (now you have 2 loops on the hook)
Yarn over and pull through both loops to complete a single crochet.
Now, you turn the work
Insert your hook under both of those side loops (on the left).
Yarn over, pull through both loops (you now have 2 loops on hook).
Yarn over and pull through both loops to complete a single crochet.
Repeat steps (always inserting your hook into the two side loops of the previous stitch)
Make as many stitches as necessary to cover the white circle making U shape upside down
- NOTE: Please refer to the video if necessary
Attach the brown cord to the white circle.
FOR THE DOOR
Slip Knot, Chain 10
In the 2nd chain from the hook, work 1 single crochet (sc) for a total of 8 SC.
In the last chain available, make 4 SC
Once you are on the bottom side to the chain, Work in the top loop of prior row
8 SC, 1 INC, 1 SC, 1 INC, 9 SC = 22 ST
Turn your work
9 SC, 1 INC, 1 SC, 1 SC, 1 INC, 9 SC = 24 ST
Make the border/frame of the door using the same instructions for the border of the front of the house.
Make approximately 70 stitches and attach them around the brown door
Then attach the door to the white circle
FRAME FOR WINDOWS (Make 2)
MR, CH3, + CH 3
DC, CH 3, DC, CH 3 and close the circle
Stuff the house with (Polyfill or your choice of stuffing)
FOUNDATION CIRCLE
USE #4 yarn and 3.75 mm hook
Color: Green
Round 1:
Slip knot Chain 4 and close the circle
Chain 3 + 14 DC
Round 2
2 DC on each stitch X 15 = 30 ST
Round 3:
(2 DC, 1 DC) x 15 = 45 ST
Round 4:
(2 DC, 1 DC, 1 DC) X 15 = 60 ST
Attached the green foundation
Use the back loop of the green stitches and the front loop of the white stitches and make a SC per each stitch available for a total of 60 SC
Once you completed the 60 single crochet, turn your work and
(1 INC, 3 SC) x 15 = 75 ST
(4 SC, 1 INO) x 15 = 90 ST
Use the same green yarn to make the garden (please see video for guidance)
PUFF Flowers
Fine yellow yarn and pink (for flowers) – used with 1.4 mm and 1.5 mm steel hook
MR, Chain 2
Make 3 HDC together, chain 2 (repeat for 5 or 6 times)
FOR THE FRONT YARN GRASS
Identify the center of the house and position a marker, not count 28 stitches to the right and 28 stitches to the left
Chain 1 + (5 SC, 1 INC) x 9 = 63 + 2 SC + SLIP STITCH = 66 ST
CURVE IN FRONT OF THE YARN
Using dark brown yarn
Make the border/frame of the curve using the same instructions for the border of the front of the house.
Make approximately 130 stitches and attach them around the green front yarn grass
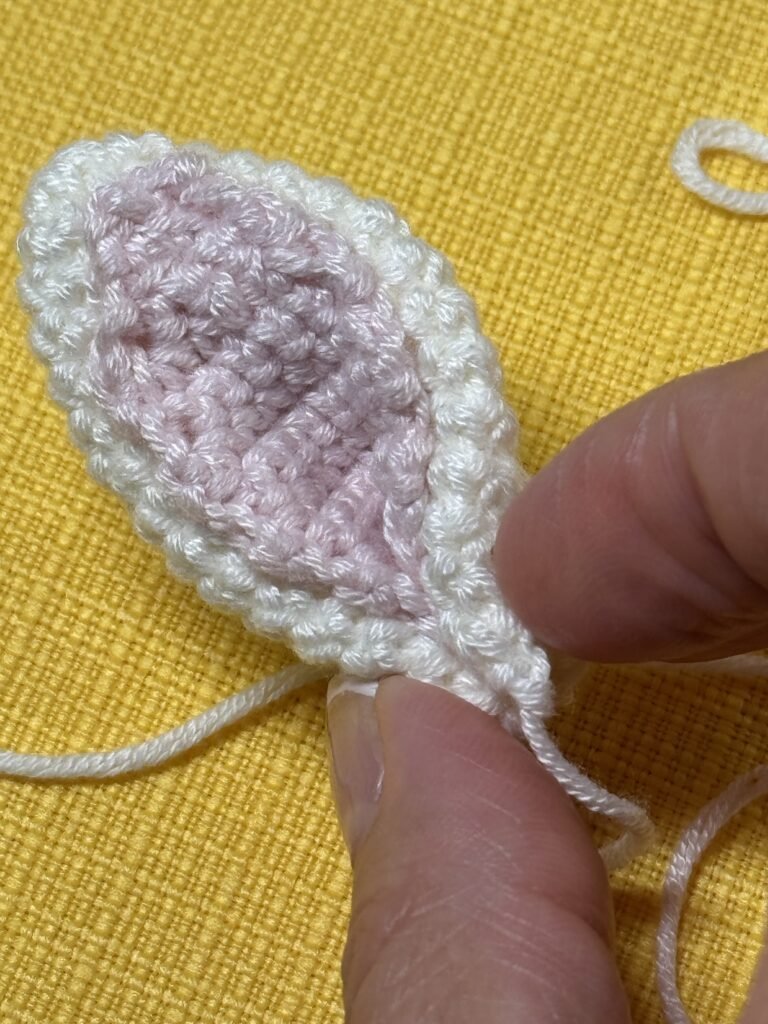
EARS (Make 2)
Round 1:
MR, 6 SC
Round 2:
1 INC, 2 SC, 1 INC, 2 SC = 8 ST
Round 3:
1 INC, 3 SC, 1 INC, 3 SC = 10 ST
Round 4:
1 INC, 4 SC, 1 INC, 4 SC = 12 ST
Round 5:
1 INC, 5 SC, 1 INC, 5 SC = 14 ST
Round 6:
1 INC, 6 SC, 1 INC, 6 SC = 16 ST
Round 7:
1 INC, 7 SC, 1 INC, 7 SC = 18 ST
Round 8:
1 INC, 8 SC, 1 INC, 8 SC = 20 ST
Round 9:
1 INC, 9 SC, 1 INC, 9 SC = 22 ST
Round 10 – Round 15:
22 SC PER ROUND
INNER EARS (Make 2)
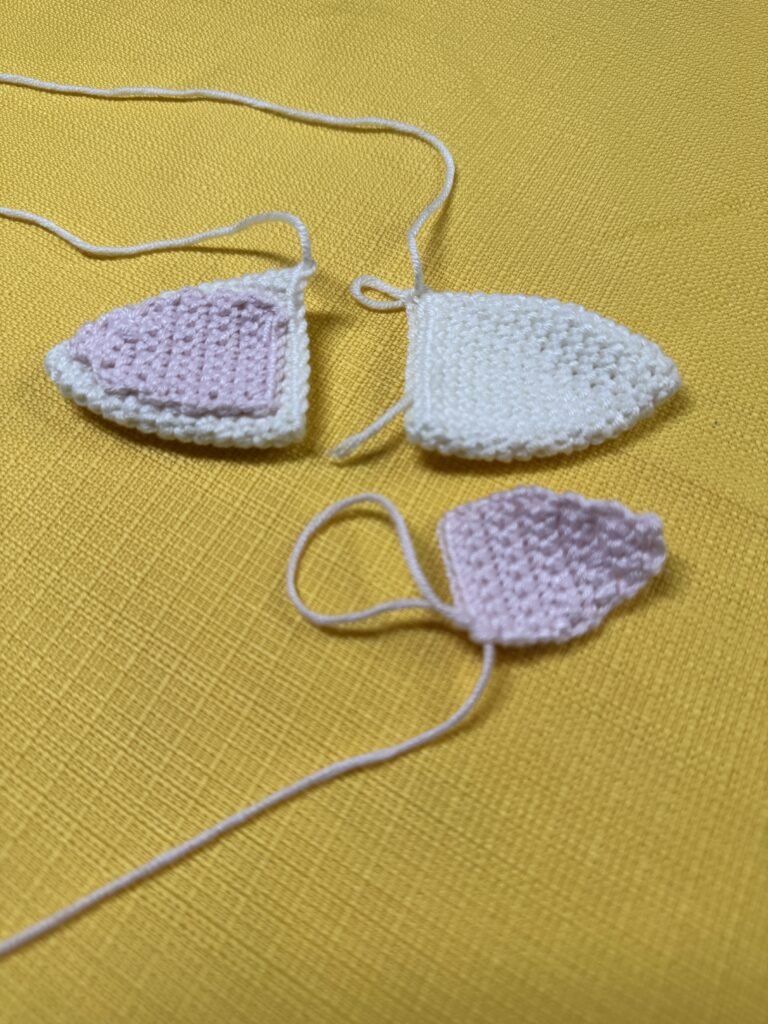
Row 1:
Slip Knot, Chain 2, In the 2nd chain from the hook, work 1 INC (sc) Turn your work
Row 2:
2 INC = 4 ST Turn your work
Row 3:
4 SC Turn your work
Row 4:
1 INC, 2 SC, 1 INC = 6 ST Turn your work
Row 5:
6 SC Turn your work
Row 6:
1 INC, 4 SC, 1 INC = 8 ST Turn your work
Row 7 – Row 12:
8 SC PER ROW
BOW
MR, Chain 4, 5 TR, CH 4, SL ST
CH 4, 5 TR, CH 4, SL ST
Use the smaller tail to wrap it around and then use the longer tail to wrap around a couple of times
 Pattern Terms of Use & License
 Pattern Terms of Use & License
-
You are welcome to sell finished products made from this pattern — handmade with love is always appreciated!
-
You may not sell, reproduce, or redistribute the pattern itself in any form, whether digital or printed.
-
For kits, workshops, or mass production, please contact me directly to request permission.
 You are welcome to sell finished products made from this pattern — handmade with love is always appreciated!
 You may not sell, reproduce, or redistribute the pattern itself in any form, whether digital or printed.
 For kits, workshops, or mass production, please contact me directly to request permission.
 If you share your finished Whimsical Bunny House, I’d love to see it!
Please credit: YarnCreationIdeas.com
Tag me on social media so I can cheer you on! 
 Want to share this pattern with others?
You’re welcome to share the blog post link directly so others can enjoy the free tutorial too! Please don’t copy and paste the pattern elsewhere.
Thank you for respecting my work and supporting my creative efforts! Happy crocheting! 🧶✨