Why You’ll Love This Project

 Beginner-Friendly Techniques – Combines C2C for the front and simple mesh stitches for the back.
 Unique Butterfly Design – The openwork motif creates a lightweight, breezy feel.
 Customizable Colors – Use bold gradients, soft pastels, or stash yarn scraps.
 Charted in Stitch Fiddle Pro – Designed from scratch, giving it a one-of-a-kind touch.
 Wearable & Stylish – Works beautifully as a summer top or layered over a tank.
 Conversation Starter – The butterfly detail is sure to get noticed.
 Inspiration Behind the Design
I wanted to create a crochet top that felt both playful and elegant—something lightweight enough for but with a special detail that makes it stand out. The idea of combining a C2C front panel with a butterfly motif on the back came from my love of textured stitches paired with airy, open designs.
The butterfly was the perfect choice because it symbolizes freedom, transformation, and creativity, and it adds a whimsical touch that balances the structured look of the C2C front. To bring the vision to life, I designed both panels in Stitch Fiddle Pro, which gave me the freedom to chart every detail exactly how I imagined it.
 Tip: Try experimenting with gradient yarns for the front panel to make the color flow naturally, or add a contrasting border around the butterfly to make it pop even more.
Materials You’ll Need
This post contains affiliate links. That means I may earn a small commission (at no extra cost to you) if you purchase through these links. Thank you for supporting YarnCreationIdeas!

 Yarn Bee Sugarwheel Cotton Sparkle (Gradient Yarn, #3 Light) – Perfect for lightweight summer tops with a soft shimmer
 Buy on Amazon
⚡ Rechargeable Electric Yarn Winder – Makes winding cakes quick, easy, and tangle-free
👉 Buy on Amazon
 Yarn Holder / Spinner
 Skill Level
Level: Confident Beginner to Intermediate
This project is approachable for crocheters who already know the basics of crochet like chains and double crochet to work on corner-to-corner (C2C) and feel comfortable working from a simple chart or diagram. The shaping is minimal, and you’ll practice combining solid C2C stitches with open mesh stitches for the butterfly design.
 Techniques Used:
Corner-to-Corner (C2C) Stitch
Double Crochet (DC)
Chain Stitch (CH)
Mesh Stitch (DC + CH combinations)
Joining Panels (side + shoulder seams)
Optional Border/Edging
Play with gradient yarns for the front panel and a contrasting solid for the butterfly back to make the design pop.
If you’re comfortable with basic stitches and reading a chart, you’ll love this project—and it’s a great confidence booster if you’re moving from beginner into intermediate crochet.
C2C Butterfly Crochet Top – Free Pattern Instructions
Yarn: Yarn Bee Sugarwheel Cotton Sparkle, #3 Light (or any lightweight gradient cotton blend) Hook: 4.0 mm (G/6)
 Finished Size: Customizable – my sample fits a women’s medium (approx. 18” wide front panel × 18” wide back panel before assembly)
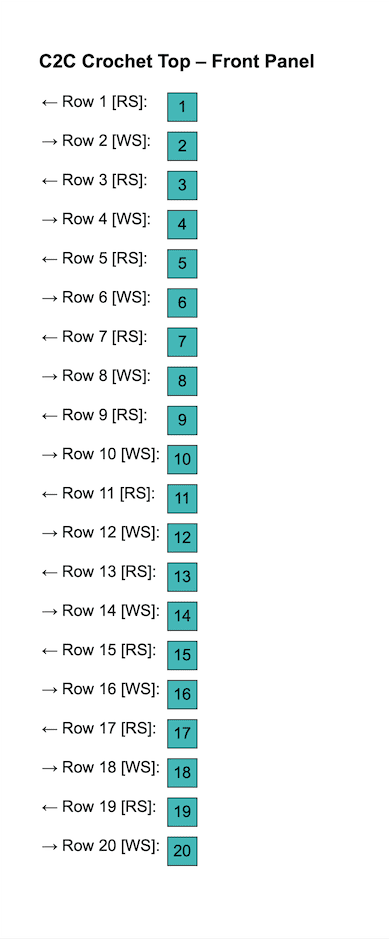
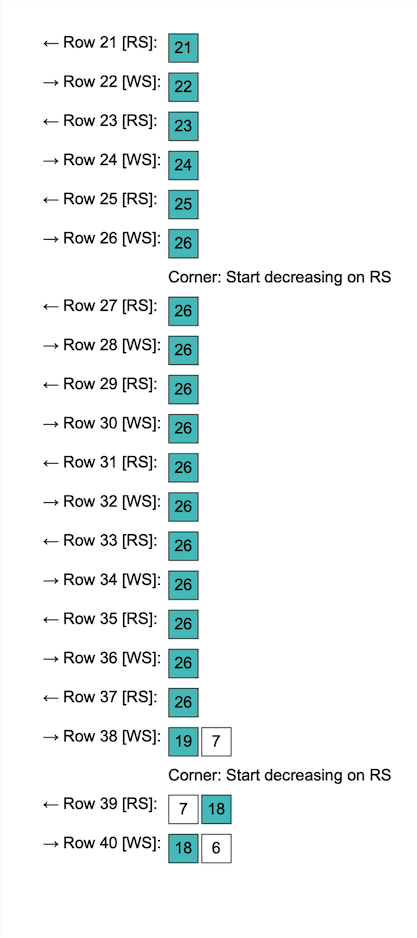
 Note: The front panel is worked in C2C rows; the back panel is a mesh chart with butterfly motif. Panels are then joined at sides and shoulders, with optional edging around neckline and hem.
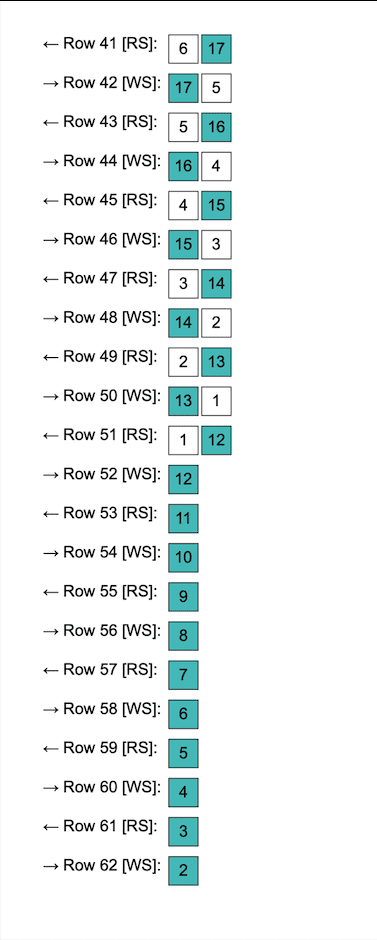
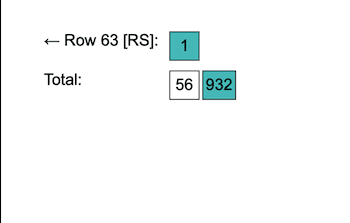
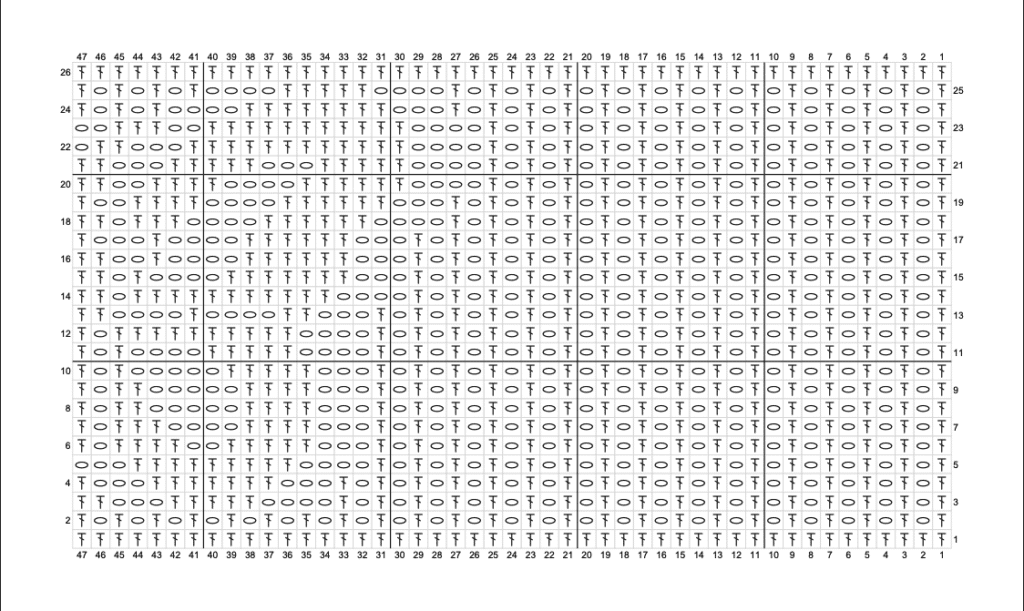
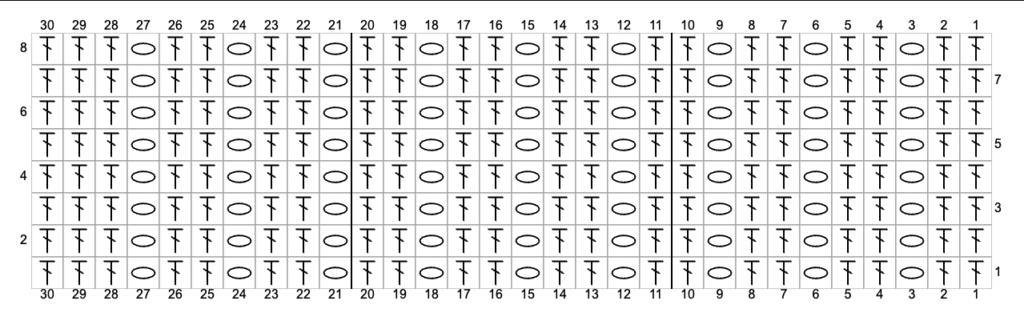
Butterfly Motif – Part 1
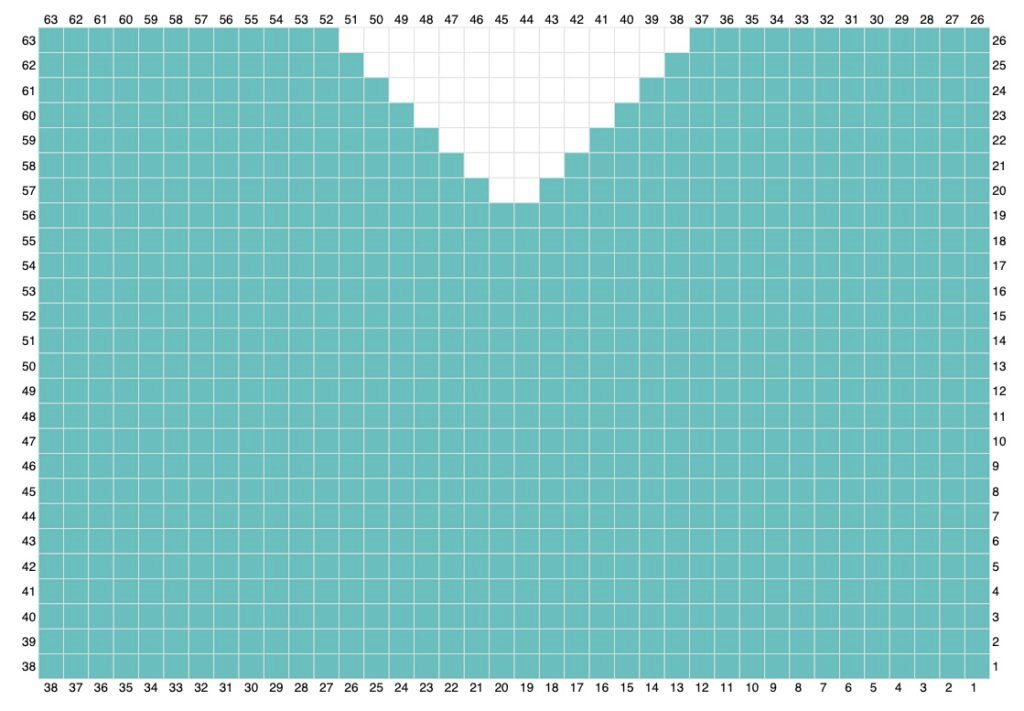
Work the back panel in mesh stitches. Begin the butterfly motif by following the chart. Each empty square represents a chain space, and each filled symbol represents a double crochet.
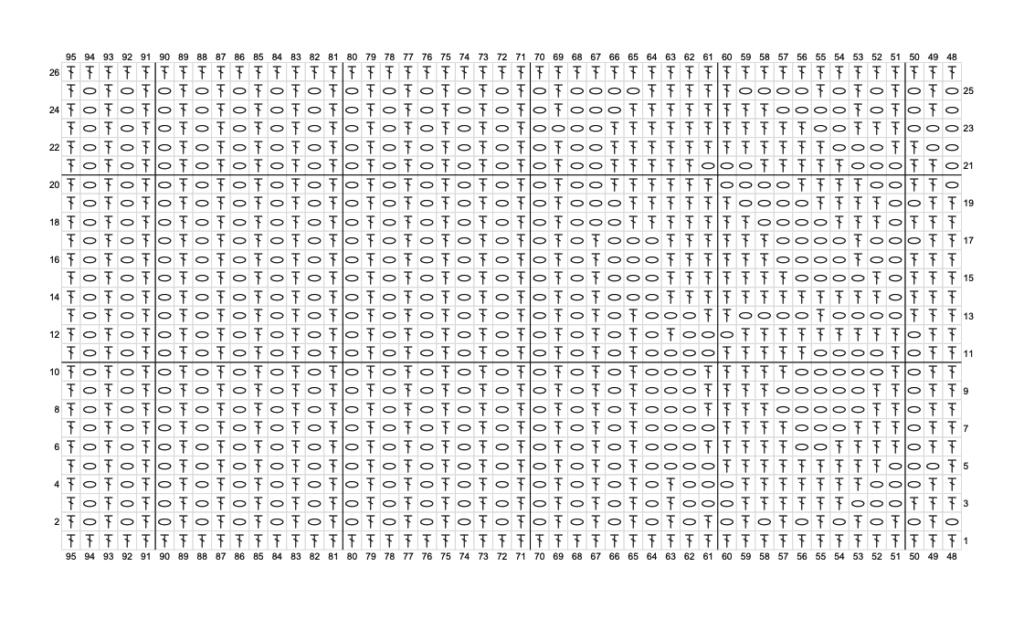
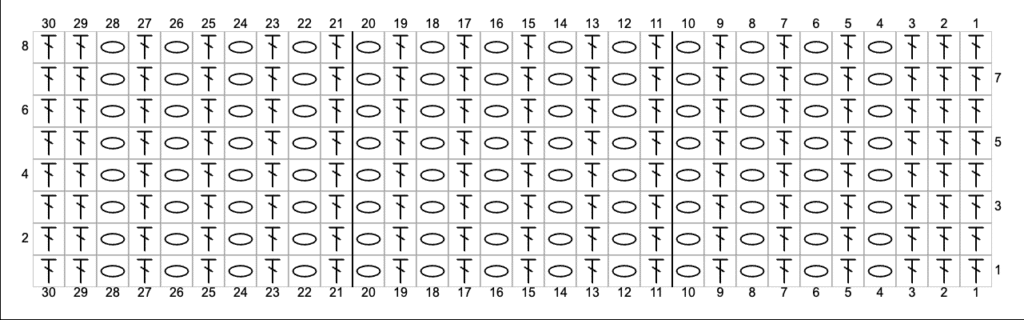
Butterfly Motif – Part 2
Continue the butterfly motif on page 2. Keep edges straight and consistent to match the front panel’s size. The motif is completed at the end of Row 26.
Joining the Panels
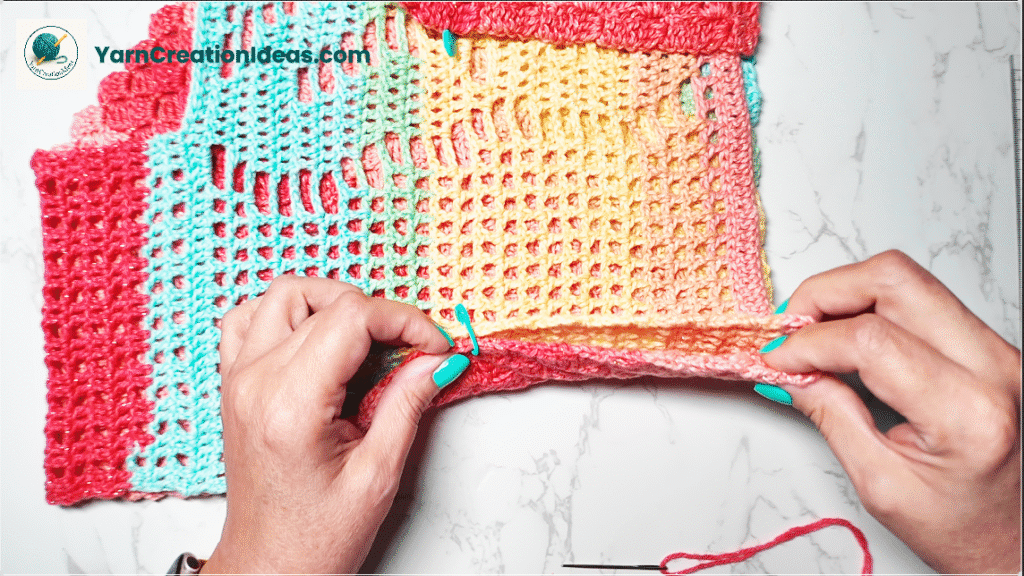
After blocking the back panel with shoulder extensions, you’re ready to join the front and back panels together.
Use a seamless join on the wrong side so the right side shows a smooth finish.
Lay the panels with right sides facing each other (so the “good” sides are touching inside).
The wrong sides are facing outward — that’s where you’ll work with your tapestry needle.
Join at the shoulders first (following the shoulder extension joins).
Then, seam down both side edges (as shown in the photo) using your chosen joining method (mattress stitch, whip stitch through back loops/edges, or slip stitch join).
Once you finish, open it up — the seams will be hidden neatly on the inside, and the right side shows a clean, polished look.